Tips for Hanging Curtain Rods with Precision and Style
Hanging curtain rods may seem like a straightforward task, but achieving a professional and aesthetically pleasing result requires careful planning and execution. Proper placement not only enhances the visual appeal of a window but also ensures the curtains function effectively, providing light control and privacy. This article outlines key considerations and techniques for successfully installing curtain rods, covering everything from measuring and selecting the right hardware to mounting the rods securely and ensuring a balanced, visually appealing finish.
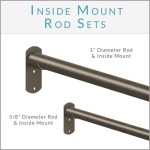
Selecting the Right Hardware and Rod
The first crucial step in hanging curtain rods is choosing the appropriate hardware and the rod itself. Several factors influence this decision, including the weight of the curtains, the desired aesthetic, and the type of wall on which the rod will be mounted. Failure to select the right hardware can lead to sagging rods, damaged walls, and ineffective window treatments.
Consider the weight of the curtains. Lightweight, sheer curtains require less robust hardware than heavier, lined drapes. Overestimating the necessary support is generally preferable to underestimating it. Metal rods, particularly those made of steel or wrought iron, are typically stronger than wooden rods and are better suited for supporting heavier fabrics. The brackets used to support the rod should also be rated for the weight of the curtains. Check the manufacturer's specifications to ensure they can adequately handle the load.
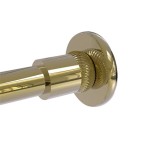
The aesthetic of the curtain rod should complement the style of the room and the curtains. Curtain rods are available in a variety of materials, finishes, and designs. For example, a sleek, minimalist metal rod may be appropriate for a modern room, while a decorative wooden rod might be a better choice for a more traditional setting. Consider the finials, the decorative ends of the rod, as they contribute significantly to the overall look. Finials can range from simple caps to elaborate designs and should be selected to match the style of the room.
The type of wall on which the rod will be mounted impacts the choice of mounting hardware. Drywall requires the use of anchors to provide adequate support. Plastic anchors are suitable for lighter loads, while metal anchors, such as molly bolts or toggle bolts, are necessary for heavier curtains. If the rod is being mounted on plaster, brick, or concrete, specialized drill bits and anchors designed for these materials are required. It is crucial to identify the wall material and select the appropriate hardware to ensure a secure and lasting installation. Stud finders can also be utilized to locate wooden studs behind the drywall – these provide the most secure anchor point for screws.
Accurate Measuring and Marking
Precise measuring and marking are essential for ensuring the curtain rod is hung at the correct height and width. Errors in measurement can lead to uneven curtains, crooked rods, and an unprofessional appearance. Taking the time to measure accurately and mark the desired locations carefully will save time and frustration in the long run.
Determine the desired height of the curtain rod. A general guideline is to hang the rod approximately 4 to 6 inches above the window frame. This creates the illusion of a larger window and allows more light to enter the room when the curtains are open. However, this height can be adjusted based on the room's proportions and the desired aesthetic. For example, in rooms with low ceilings, hanging the rod closer to the ceiling can create the illusion of height. In rooms with tall ceilings, hanging the rod further down can help balance the proportions of the room.
Calculate the desired width of the curtain rod. The rod should extend beyond the window frame on both sides to allow the curtains to fully clear the window when open. This maximizes the amount of light that enters the room and prevents the curtains from blocking the view. A general guideline is to extend the rod 3 to 6 inches beyond the window frame on each side. This width can be adjusted based on the size of the window and the desired amount of light and privacy.
Mark the locations for the mounting brackets using a level and a pencil. Use a measuring tape to ensure that the brackets are positioned at the correct height and width. Use a level to ensure that the brackets are aligned horizontally. Inaccurate marking can result in a crooked curtain rod or curtains that hang unevenly. Double-check the measurements and markings before proceeding with the installation.
Consider the placement of wall studs. Ideally, at least one of the brackets should be mounted directly into a wall stud. This provides the most secure support and reduces the risk of the rod pulling away from the wall. Use a stud finder to locate the studs and adjust the bracket placement accordingly. If neither bracket can be mounted into a stud, use appropriate drywall anchors to provide adequate support.
Mounting the Brackets and Rod
Once the hardware is selected and the mounting locations are marked, the next step is to mount the brackets and install the curtain rod. Proper mounting techniques are crucial for ensuring the rod is securely attached to the wall and can support the weight of the curtains. Rushing this step or using improper techniques can lead to unstable rods, damaged walls, and potentially dangerous situations.
Pre-drill pilot holes for the screws. This is particularly important when mounting brackets on drywall, plaster, or wood. Pilot holes prevent the screws from splitting the wood or damaging the wall. Use a drill bit that is slightly smaller than the diameter of the screws. For drywall, pilot holes are necessary to allow the anchors to be inserted properly.
Install the mounting brackets using the appropriate screws and anchors. If mounting the brackets directly into wall studs, use wood screws that are long enough to penetrate the stud by at least 1 inch. If using drywall anchors, follow the manufacturer's instructions for installing the anchors. Ensure that the brackets are securely attached to the wall and that they can support the weight of the curtains. Test the stability of the brackets by applying pressure to them before installing the curtain rod.
Insert the curtain rod into the brackets. Ensure that the rod is properly seated in the brackets and that the finials are securely attached to the ends of the rod. If the rod is adjustable, adjust it to the desired length and tighten any locking mechanisms. Before hanging the curtains, double-check the level of the rod and make any necessary adjustments.
Hang the curtains and check for proper functionality. Ensure that the curtains slide smoothly along the rod and that they fully cover the window when closed. Adjust the position of the brackets or rod as needed to achieve the desired look and functionality. Consider using curtain rings or clips to attach the curtains to the rod, as these can make it easier to open and close the curtains.
Consider using a helper. Hanging curtains can be difficult to do alone, especially with longer rods and heavier curtains. Having a helper can make the job easier and safer. A helper can hold the rod and curtains while you adjust the brackets or install the screws. They can also provide a second opinion on the placement and appearance of the curtains.

Tips And Tricks For Hanging Drapes Love Your Abode

How To Install Curtain Rods Best Practices The Shade

How To Hang Curtains In 7 Steps

How To Install Curtain Rods Best Practices The Shade

A Quick Way To Hang Curtain Rods Young House Love

How To Install Curtain Rods And Hang Curtains

How To Install Curtain Rods 5 Simple Steps

How To Install Curtain Rods Best Practices The Shade

A Guide To Curtain Measuring And Installation Tms Menagerie

It S A Grandville Life Thursday Tips Tricks How To Hang Curtains