Pop-Up Camper Curtains with Clips: A Comprehensive Guide
Pop-up campers offer an affordable and relatively lightweight entry point into the RV lifestyle. However, the factory-installed curtains in these campers often lack aesthetic appeal, durability, or adequate light blockage. Replacing these curtains with custom-made options, particularly those utilizing clips for attachment, presents a practical and visually pleasing upgrade. This article delves into the various aspects of pop-up camper curtains with clips, including material selection, construction techniques, installation methods, and considerations for specific needs.
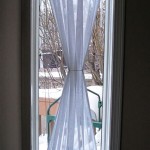
The primary function of pop-up camper curtains is often twofold: to provide privacy and to regulate light. Factory-installed curtains are frequently constructed from thin, translucent materials that offer minimal privacy and allow significant light penetration. Upgrading to thicker, more opaque fabrics can dramatically improve the camper's living environment, creating a more comfortable and secure space. Furthermore, well-chosen curtains can enhance the overall aesthetic of the camper interior, contributing to a more personalized and enjoyable camping experience.
Curtains with clips provide a flexible and often more secure attachment method compared to curtains that rely solely on loops or sewn-in hardware. Clips allow for easy removal and reinstallation of the curtains for cleaning or replacement, and they can be adapted to various track or rod systems commonly found in pop-up campers. This adaptability makes clip-on curtains a popular choice for DIY camper renovations.
Selecting the Right Fabric for Pop-Up Camper Curtains
Choosing the appropriate fabric is paramount to the success of any curtain project. Several factors should be considered, including the desired level of light blockage, the ease of care, the fabric's durability, and its overall aesthetic. The climate in which the camper will be used should also influence fabric selection, as thicker fabrics offer better insulation in colder environments, while lighter, breathable fabrics are more suitable for warmer climates.
For optimal light blockage and privacy, blackout fabrics are an excellent choice. These fabrics are typically coated with a layer of acrylic or similar material that prevents light from passing through. Blackout fabrics are available in a wide range of colors and patterns, allowing for customization to suit individual preferences. However, it is important to note that blackout fabrics can be heavier and may require more robust clips and track systems.
Duck cloth, a tightly woven cotton fabric, offers a balance of durability, light blockage, and affordability. Duck cloth is relatively easy to sew and is available in a variety of weights and colors. It can be treated with water-repellent finishes to enhance its resistance to moisture and stains. While duck cloth provides decent privacy, it may not offer the same level of light blockage as dedicated blackout fabrics.
Linen and cotton fabrics offer a more natural look and feel. Linen is known for its breathability and elegant drape, while cotton is versatile and easy to care for. However, both linen and cotton tend to wrinkle easily and may require ironing. They also tend to be less effective at blocking light compared to blackout fabrics and duck cloth. Consider using a lining material with linen or cotton to improve light blockage and add structure to the curtains.
Synthetic fabrics such as polyester and microfiber offer excellent durability, wrinkle resistance, and ease of care. Polyester fabrics are often treated with stain-resistant finishes, making them ideal for use in campers where spills and messes are more likely to occur. Microfiber is known for its soft texture and excellent drape. Both polyester and microfiber fabrics are available in a wide range of colors and patterns, including options that mimic the look and feel of natural fibers.
Constructing Pop-Up Camper Curtains with Clips: A Step-by-Step Guide
Creating custom curtains for a pop-up camper is a manageable DIY project that requires basic sewing skills and attention to detail. The process involves measuring the windows, selecting the fabric, cutting the fabric to size, sewing the seams and hems, and attaching the clips.
Accurate measurements are crucial for ensuring a proper fit. Measure the width and height of each window opening, adding extra inches for seam allowances and hems. Consider the desired length of the curtains, keeping in mind that longer curtains may provide better light blockage and privacy. It is advisable to create a template using paper or inexpensive fabric to verify the measurements before cutting the final fabric.
Once the fabric has been selected and measured, cut it to the appropriate size, adding seam allowances of at least one inch on each side and at the top and bottom. For hems, allow for at least two inches at the bottom and one inch at the top. Use a rotary cutter and cutting mat for accurate and efficient cutting.
Sew the side seams first, using a straight stitch and a durable thread. Press the seams open to reduce bulk. Next, sew the top hem, folding the fabric over twice to create a clean finish. Reinforce the top hem with multiple rows of stitching for added durability, as this area will bear the weight of the curtains and clips.
Sew the bottom hem in a similar manner to the top hem, folding the fabric over twice and securing it with multiple rows of stitching. The bottom hem can be weighted with small metal weights to improve the drape of the curtains, particularly for longer curtains. Weights can be sewn into the hem or inserted into small pockets created within the hem.
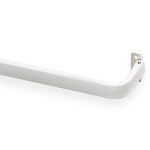
The final step is attaching the clips. Various types of clips are available, including pinch clips, curtain rings with clips, and snap tape with corresponding snaps. The choice of clip depends on the type of track or rod system used in the camper. Pinch clips offer a secure and adjustable attachment method, while curtain rings with clips allow for easy sliding along a rod. Snap tape provides a clean and streamlined look but requires precise alignment during installation.
Attach the clips evenly spaced along the top hem of the curtains. The spacing will depend on the weight of the fabric and the desired fullness of the curtains. As a general guideline, space the clips approximately 4 to 6 inches apart. Use pliers or a similar tool to securely fasten the clips to the fabric, ensuring that they are evenly aligned.
Considerations for Specific Needs and Installation Techniques
Beyond the basic construction process, several additional considerations can enhance the functionality and aesthetics of pop-up camper curtains with clips. These include incorporating linings for improved light blockage and insulation, adding valances for a more polished look, and utilizing alternative installation methods for non-traditional track systems.
Linings can significantly improve the performance of curtains, particularly those made from lighter-weight fabrics. A lining made from blackout fabric can effectively block light, while a lining made from flannel or fleece can add insulation and reduce condensation. Linings are typically sewn to the back of the main fabric, creating a double-layered curtain. The lining should be slightly smaller than the main fabric to prevent it from peeking out from behind the curtain.
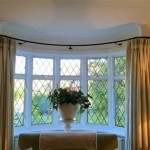
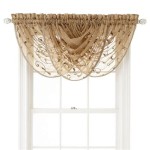
Valances are decorative fabric panels that are hung at the top of the window to conceal the curtain track or rod. Valances can add a touch of elegance and sophistication to the camper interior. They can be constructed from the same fabric as the curtains or from a complementary fabric. Valances can be attached to the curtain track or rod using separate clips or by sewing a channel for the rod directly into the valance fabric.
Some pop-up campers utilize non-traditional track systems that may require alternative installation methods. For example, some campers have tracks that are designed to accommodate only specific types of clips or hooks. In these cases, it may be necessary to modify the existing track system or to create a custom attachment method. One option is to attach Velcro strips to the top of the curtains and to the camper walls, allowing for easy removal and reinstallation. Another option is to use a combination of clips and bungee cords to secure the curtains in place.
Maintaining pop-up camper curtains with clips is crucial to ensure their longevity and functionality. Regularly vacuuming or brushing the curtains can remove dust and debris. Stains should be treated promptly with a mild detergent and water. Curtains made from machine-washable fabrics can be laundered according to the manufacturer's instructions. However, it is important to remove the clips before washing to prevent damage to the clips or the washing machine. Curtains should be thoroughly dried before reattaching the clips and rehanging them in the camper.
Replacing pop-up camper curtains with custom-made options that utilize clips offers a significant upgrade in terms of privacy, light control, aesthetics, and functionality. By carefully selecting the right fabric, employing proper construction techniques, and considering specific needs and installation challenges, camper owners can create a more comfortable and enjoyable camping environment.

Pop Up Camper Curtains Valances Part 2 The Princess

Set Of 10 Pupclips Pop Up Camper Drape Solution Etsy

The Frilly Things All Curtains Designs By Danielle Graphic And Web Design

Pop Up Camper Makeover The Curtains Part 1 Princess

Diy Rv Renovation Curtain Replacement In A Pop Up Camper Or Airstream Camping And Travel Resources For Families

How To Hang Pop Up Camper Curtains Est And Easiest Ways Youtube

How To Replace Pop Up Camper Curtains The Family Trip

Coleman Pop Up Curtain Rod Holder 10 Pack Etsy

Our Pop Up Camper Zevy Joy

Cushions Curtains Coleman Pop Up Parts