How To Hang Curtains With Brackets
Hanging curtains is a common home improvement task that can significantly enhance the aesthetics of a room, provide privacy, and control the amount of natural light entering a space. The process involves more than simply attaching fabric to a rod; it requires careful planning, precise measurements, and secure installation to ensure the curtains hang properly and function effectively. One crucial element of the installation is the use of brackets. These support the curtain rod and bear the weight of the drapery. Selecting the right type of brackets and installing them correctly are essential for a successful and long-lasting curtain installation. This article provides a comprehensive guide on how to hang curtains using brackets, covering everything from preparations to the final touches.
Preparing for Curtain Installation
Before commencing the installation process, it is imperative to gather all necessary materials and tools. This initial preparation phase ensures efficiency and minimizes potential disruptions during the hanging process. A comprehensive checklist includes, but is not limited to, the following:
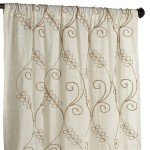
Curtains: The curtains themselves should be selected based on the desired aesthetic, functionality, and dimensions of the window. Ensure that the curtains are the correct length and width for the intended placement. It is generally advisable to purchase curtains that are slightly longer than the window to allow for hemming or adjustments if necessary.
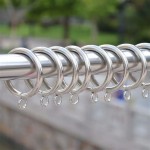
Curtain Rod: The curtain rod should be chosen to complement the curtains and the overall decor of the room. Consider the material, diameter, and style of the rod. Heavier curtains require a sturdier rod to prevent sagging or bending. The length of the rod should extend beyond the window frame on both sides to allow the curtains to be fully opened without obstructing the window.
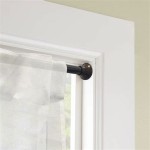
Brackets: Curtain rod brackets are responsible for supporting the weight of the rod and curtains. They come in various styles, sizes, and materials. The type of bracket selected should be appropriate for the weight of the curtains and the type of rod being used. Consider factors such as the projection length (the distance the bracket extends from the wall) and the weight capacity. Additionally, ensure the brackets are compatible with the diameter of the curtain rod.
Measuring Tools: Accurate measurements are crucial for proper curtain placement. A measuring tape is essential for determining the desired height of the rod and the spacing between brackets. A level is necessary to ensure the rod is installed horizontally. A pencil is needed for marking the locations for the brackets.
Drilling Tools: A drill is required for creating pilot holes for the screws that will secure the brackets to the wall. The drill bit size should be appropriate for the type of screws being used and the material of the wall. If drilling into drywall, wall anchors may be necessary to provide additional support.
Fasteners: Screws are used to attach the brackets to the wall. The length and type of screws should be appropriate for the material of the wall. For drywall, use drywall screws with wall anchors. For wood studs, use wood screws. Ensure the screws are long enough to penetrate the wall securely without protruding through the other side.
Wall Anchors: Wall anchors are used in drywall or plaster walls to provide additional support for the screws. They come in various types, including plastic anchors, metal anchors, and toggle bolts. The type of anchor selected should be appropriate for the weight of the curtains and the thickness of the wall.
Screwdriver: A screwdriver is needed to tighten the screws into the brackets and wall anchors. A manual screwdriver or a power screwdriver can be used. Ensure the screwdriver bit matches the type of screw being used to prevent stripping the screw head.
Once all the necessary materials and tools have been assembled, it is important to prepare the workspace. Clear the area around the window and protect the floor with a drop cloth or newspaper. This will prevent damage to the surrounding area and make cleanup easier.
Determining Bracket Placement and Height
Proper bracket placement is crucial for ensuring the curtains hang correctly and function effectively. The height and spacing of the brackets should be carefully considered to achieve the desired aesthetic and functionality. Several factors influence bracket placement, including the height of the window, the length of the curtains, and the desired overall look.
Height Above the Window: The height at which the brackets are mounted above the window significantly impacts the appearance of the room. Mounting the brackets higher than the window frame can create the illusion of taller ceilings and make the window appear larger. A general guideline is to mount the brackets 4 to 6 inches above the window frame. However, this can be adjusted based on personal preference and the specific characteristics of the room. For lower ceilings, mounting the brackets closer to the window frame may be preferable. For higher ceilings, mounting the brackets higher can create a more dramatic effect.
Width Beyond the Window Frame: The width at which the brackets are mounted beyond the window frame affects how much light enters the room when the curtains are open. Mounting the brackets wider than the window frame allows the curtains to be fully opened without obstructing the window. This maximizes the amount of natural light that enters the room. A general guideline is to extend the rod 3 to 6 inches beyond the window frame on each side. This provides sufficient space for the curtains to be fully opened. The exact amount of extension can be adjusted based on the desired level of light control and the overall dimensions of the window.
Spacing Between Brackets: The spacing between brackets is essential for ensuring the curtain rod is adequately supported and does not sag in the middle. The distance between brackets depends on the length of the rod and the weight of the curtains. As a general rule, brackets should be spaced no more than 36 inches apart. For heavier curtains or longer rods, additional brackets may be necessary to provide sufficient support. It is also advisable to place brackets near the ends of the rod to prevent the rod from slipping out of the brackets. Evenly distribute the remaining brackets between the end brackets to ensure consistent support along the entire length of the rod.
Marking Bracket Locations: Once the desired height and width have been determined, use a measuring tape, level, and pencil to mark the locations for the brackets. Start by measuring the desired height above the window frame and marking the location for the top of the bracket. Use a level to ensure the mark is horizontal. Then, measure the desired width beyond the window frame and mark the locations for the sides of the brackets. Again, use a level to ensure the marks are vertical. Double-check all measurements to ensure accuracy before proceeding to the next step.
Locating Wall Studs: Whenever possible, mount the brackets directly into wall studs. Wall studs provide the strongest support for the brackets and prevent them from pulling out of the wall. Use a stud finder to locate the wall studs near the marked bracket locations. If a wall stud is located near the marked location, adjust the bracket placement slightly to align with the stud. If a wall stud is not available, use wall anchors to provide additional support for the screws.
Installing the Brackets Securely
The secure installation of the brackets is arguably the most important step in hanging curtains. Properly installed brackets ensure the stability and longevity of the entire curtain system. Failure to secure the brackets adequately can lead to sagging rods, falling curtains, and potential damage to the wall. This section provides a detailed guide on how to install the brackets securely, covering the steps involved in drilling pilot holes, attaching the brackets, and using wall anchors when necessary.
Drilling Pilot Holes: Before attaching the brackets to the wall, it is necessary to drill pilot holes at the marked locations. Pilot holes make it easier to insert the screws and prevent the wood from splitting. Use a drill bit that is slightly smaller than the diameter of the screws being used. Hold the bracket in place at the marked location and use the drill to create pilot holes through the screw holes in the bracket. Drill the pilot holes deep enough to accommodate the length of the screws. If drilling into a wall stud, drill the pilot hole directly into the stud. If drilling into drywall or plaster, be sure to use wall anchors.
Attaching Brackets to Wall Studs: If a wall stud is available, attach the brackets directly to the stud using wood screws. Hold the bracket in place over the pilot holes and insert the screws through the screw holes in the bracket and into the pilot holes in the stud. Use a screwdriver to tighten the screws until the bracket is securely attached to the wall. Do not overtighten the screws, as this can strip the screw head or damage the wall stud. Ensure the bracket is flush against the wall and does not wobble or move.
Using Wall Anchors in Drywall or Plaster: If a wall stud is not available, use wall anchors to provide additional support for the screws. There are various types of wall anchors available, each with its own installation procedure. Plastic anchors are suitable for lighter curtains, while metal anchors and toggle bolts are better suited for heavier curtains. Follow the manufacturer's instructions for installing the wall anchors. Generally, the process involves drilling a hole in the wall, inserting the anchor into the hole, and then inserting the screw into the anchor. The anchor expands or grips the wall, providing a secure hold for the screw. Ensure the wall anchor is properly installed and can support the weight of the curtains before attaching the bracket.
Securing the Brackets with Screws and Anchors: Once the pilot holes have been drilled and the wall anchors have been installed (if necessary), attach the brackets to the wall using the appropriate screws and wall anchors. Hold the bracket in place over the pilot holes and insert the screws through the screw holes in the bracket and into the pilot holes or wall anchors. Use a screwdriver to tighten the screws until the bracket is securely attached to the wall. Ensure the bracket is flush against the wall and does not wobble or move. Double-check that the screws are securely fastened and that the bracket is firmly attached to the wall.
Verifying Bracket Stability: After attaching the brackets to the wall, it is essential to verify their stability. Gently tug on each bracket to ensure it is securely attached and does not move. If a bracket feels loose or unstable, tighten the screws further or use a different type of wall anchor. For heavier curtains, it may be necessary to use additional brackets to provide sufficient support. Ensure all brackets are securely attached before proceeding to the next step. A stable and secure bracket installation is crucial for the long-term performance of the curtain system.

How To Install Curtain Rods 5 Simple Steps

How To Install Curtain Rods Best Practices The Shade

A Guide To Curtain Measuring And Installation Tms Menagerie

How To Install Curtain Rods Best Practices The Shade

How To Install Curtain Rods 5 Simple Steps

How To Install Curtain Rods Best Practices The Shade

How To Install Curtain Rods Best Practices The Shade

A Guide To Curtain Measuring And Installation Tms Menagerie

Diy Curtain Rod Plus How To Hang Curtains

Diy Curtain Rods And Brackets