How To Hang Beaded Curtains
Beaded curtains offer a unique and decorative way to divide spaces, add visual texture, or simply enhance the aesthetic appeal of a room. They can be used in doorways, windows, closets, or as decorative wall hangings. Hanging beaded curtains properly ensures their longevity, functionality, and overall visual impact. This article provides a comprehensive guide on how to hang beaded curtains, covering everything from preparation to installation.
Preparation and Planning
Before commencing the installation process, careful preparation is paramount. This stage involves accurate measurements, appropriate material selection, and a thorough understanding of the desired aesthetic outcome. Rushing this phase can lead to inaccuracies and unsatisfactory results.
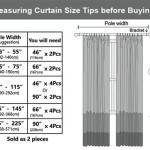
Measuring the Opening: The first step is to measure the width and height of the opening where the beaded curtain will be hung. Precise measurements are essential for determining the appropriate length and width of the curtain rod or track. Measure the width at the top, middle, and bottom of the opening to account for any discrepancies. Use the smallest width measurement to ensure the curtain fits properly. Measure the height from the top of the opening down to where you want the bottom of the curtain to reach. Consider whether you want the curtain to hang slightly above the floor, touch the floor, or have some strands extending below the threshold.
Selecting the Right Beaded Curtain: Beaded curtains come in various materials, designs, and strand densities. Choosing the right curtain depends on the desired effect and the overall style of the space. Consider the color, material (wood, acrylic, glass, etc.), and pattern of the beads. A denser curtain will offer more privacy, while a sparser curtain will allow more light and visibility. Ensure the length of the curtain is suitable for the measured height. If the curtain is too long, it will drag on the floor; if it's too short, it will look awkward.
Choosing the Hanging Mechanism: The method used to hang beaded curtains directly affects their stability and appearance. Several options are available, each with its own advantages and disadvantages:
- Curtain Rod: This is a common and versatile option. A standard curtain rod can be used if it is strong enough to support the weight of the beaded curtain. The rod should be slightly wider than the opening to allow for proper hanging.
- Track System: A track system provides a more professional and streamlined look. These systems typically consist of a metal track that is mounted to the ceiling or wall and sliders that attach to the curtain. Track systems offer smooth and easy movement of the curtain.
- Tension Rod: A tension rod is a simple and non-permanent option, ideal for rentals or temporary installations. However, tension rods may not be suitable for heavier beaded curtains as they can be prone to slippage.
- Wooden Batten: A wooden batten is a sturdy option that can be custom-made to the exact width of the opening. It can be painted or stained to match the surrounding décor. Holes are drilled into the batten for attaching the curtain strands.
Gathering Necessary Tools and Materials: Before starting the installation, gather all the required tools and materials. This will prevent interruptions and ensure a smooth process. The following items are typically needed:
- Beaded curtain
- Curtain rod, track system, tension rod, or wooden batten
- Measuring tape
- Pencil
- Drill (if installing a curtain rod, track system, or wooden batten)
- Screws or mounting hardware (appropriate for the wall or ceiling material)
- Level
- Ladder or step stool (if needed)
- Screwdriver
- Safety glasses
Installation Process
The installation process varies depending on the chosen hanging mechanism. This section provides detailed instructions for each method.
Installing with a Curtain Rod:
- Mark the Mounting Points: Use a measuring tape and pencil to mark the locations for the curtain rod brackets. Ensure the brackets are positioned at the desired height and are level. Use a level to verify the accuracy of the marks.
- Drill Pilot Holes: Using a drill, create pilot holes at the marked locations. The size of the drill bit should be slightly smaller than the screws being used. For drywall, use wall anchors to provide additional support.
- Attach the Brackets: Secure the curtain rod brackets to the wall using screws. Ensure the brackets are firmly attached and can support the weight of the curtain.
- Hang the Curtain Rod: Place the curtain rod into the brackets. Ensure the rod is securely seated in the brackets.
- Hang the Beaded Curtain: Most beaded curtains come with loops or rings at the top of each strand. Hang these loops or rings onto the curtain rod, ensuring they are evenly spaced.
Installing with a Track System:
- Mark the Mounting Points: Use a measuring tape and pencil to mark the locations for the track system. Ensure the track is centered above the opening and is level.
- Drill Pilot Holes: Using a drill, create pilot holes at the marked locations. For drywall or plaster, use appropriate wall anchors.
- Attach the Track: Secure the track to the wall or ceiling using screws. Ensure the track is firmly attached and can support the weight of the curtain.
- Attach the Sliders: Insert the sliders into the track. The sliders will hold the curtain strands.
- Hang the Beaded Curtain: Attach the curtain strands to the sliders. Most sliders have hooks or clips that can be used to secure the strands. Ensure the strands are evenly spaced along the track.
Installing with a Tension Rod:
- Measure the Opening: Measure the width of the opening where the tension rod will be installed.
- Adjust the Tension Rod: Adjust the tension rod to be slightly longer than the width of the opening.
- Install the Tension Rod: Compress the tension rod and place it inside the opening. Release the tension rod, allowing it to expand and grip the sides of the opening. Ensure the rod is level.
- Hang the Beaded Curtain: Hang the beaded curtain onto the tension rod. Ensure the strands are evenly spaced.
- Test the Stability: Gently test the stability of the tension rod to ensure it can support the weight of the curtain. If the rod slips, adjust the tension or consider using a different hanging method.
Installing with a Wooden Batten:
- Prepare the Wooden Batten: Cut the wooden batten to the exact width of the opening. Sand the edges to ensure they are smooth. Paint or stain the batten to match the surrounding décor, if desired.
- Drill Holes for the Strands: Drill evenly spaced holes along the length of the batten. The size of the holes should be slightly larger than the diameter of the curtain strands.
- Attach the Strands: Thread each curtain strand through the holes in the batten. Secure the strands with knots or crimps to prevent them from slipping out.
- Mark the Mounting Points: Mark the locations for the batten on the wall or ceiling. Ensure the batten is centered above the opening and is level.
- Drill Pilot Holes: Drill pilot holes at the marked locations. For drywall or plaster, use appropriate wall anchors.
- Attach the Batten: Secure the batten to the wall or ceiling using screws. Ensure the batten is firmly attached and can support the weight of the curtain.
Additional Considerations for Optimal Installation
Beyond the core installation steps, several additional considerations can enhance the final result and ensure the longevity and functionality of the beaded curtains.
Strand Density and Privacy: The density of the beaded curtain significantly impacts the level of privacy it provides. Denser curtains with closely spaced strands offer greater privacy, while sparser curtains allow more light and visibility. Consider the intended use of the curtain when selecting the strand density. For doorways leading to private spaces, a denser curtain is preferable. For purely decorative purposes, a sparser curtain may suffice.
Material Selection and Durability: The material of the beads affects the durability and longevity of the curtain. Wood beads are generally durable and offer a natural aesthetic. Acrylic beads are lightweight and resistant to breakage, making them suitable for high-traffic areas. Glass beads are more delicate but offer a sophisticated and elegant look. Choose a material that aligns with the intended use and environmental conditions. For areas with high humidity, avoid materials that are prone to moisture damage.
Weight Distribution: Proper weight distribution is crucial for the stability and longevity of the hanging mechanism. Ensure the curtain rod, track system, or wooden batten is adequately supported to handle the weight of the beaded curtain. Use appropriate mounting hardware and wall anchors to distribute the weight evenly. Overloading the hanging mechanism can lead to sagging, slippage, or even failure. For heavier beaded curtains, consider using multiple brackets or mounting points for added support.
Maintenance and Care: Regular maintenance can extend the life of the beaded curtains and keep them looking their best. Dust the curtains regularly with a soft cloth or duster to prevent buildup. For more thorough cleaning, gently wipe the beads with a damp cloth and mild soap. Avoid using harsh chemicals or abrasive cleaners, as they can damage the beads. Periodically inspect the hanging mechanism for any signs of wear or damage and make necessary repairs. Tangled strands can be carefully untangled by hand. Preventative measures such as avoiding excessive pulling or tugging on the curtain can also help maintain its condition.
Customization and Personalization: Beaded curtains offer opportunities for customization and personalization. The length of the strands can be adjusted to create different visual effects. Different colors and patterns of beads can be combined to match the surrounding décor. Consider adding decorative elements such as charms, crystals, or tassels to personalize the curtain. DIY projects can transform ordinary beaded curtains into unique and expressive pieces of art. Explore different design possibilities and embrace creativity to create a beaded curtain that reflects personal style and enhances the aesthetic appeal of the space.
By following these detailed instructions and considering these additional factors, individuals can successfully hang beaded curtains and enhance the aesthetic appeal of their living spaces. This provides an understanding of critical considerations involved in hanging beaded curtains and ensures a satisfactory final product.

How To Hang Beaded Curtains 13 Steps With Pictures Wikihow Fun

How To Hang Beaded Curtains 5 Simple Diy Steps Krostrade

How To Hang A Beaded Curtain Wildthings Time With Tina Youtube

Wildthings How To Hang Wood Beaded Curtains Next Each Other Youtube

Pin On Bead Curtain

How To Set Up A Backdrop Using Hanging Beads And String Curtains Generation Com

How To Hang A Beaded Curtain Wildthings Time With Tina Youtube

Beaded Curtain Window Hanging From A Pergola Or Hook Off Porch Could Be Made Easily Beautifully Without Muc Curtains Beads Crafts

How To Make Beaded Curtains 14 Steps With Pictures Wikihow

Beaded Curtain Hanging Beads Bohemian Boho Doorway Etsy
See Also