Hang Curtains With Tension Rods: A Comprehensive Guide
Tension rods offer a simple and often damage-free method for hanging curtains. They are particularly useful in rental properties or situations where drilling holes is undesirable or impractical. The principle is straightforward: the rod is extended between two surfaces (typically within a window frame or doorway) until it creates enough pressure to hold itself, and any curtains hung upon it, in place. However, achieving a stable and aesthetically pleasing result requires careful planning and execution. This article outlines the necessary steps, considerations, and techniques for successfully hanging curtains with tension rods.
Before embarking on the installation process, several factors must be taken into account. These include the type of curtains, the rod's weight capacity, the surface material of the mounting location, and the desired aesthetic. Understanding these elements will contribute to a successful and durable installation.
Selecting the Appropriate Tension Rod
The market offers a variety of tension rods, each designed for specific purposes and load capacities. Choosing the right rod is crucial for ensuring that it can support the weight of the intended curtains without slipping or damaging the mounting surfaces. Consider the following factors when selecting a tension rod:
Rod Diameter and Material: Thicker rods generally provide greater stability and weight capacity. Common materials include steel, aluminum, and plastic. Steel rods are typically the strongest but can also be heavier. Aluminum rods offer a good balance of strength and weight, while plastic rods are the least expensive and suitable for lightweight curtains.
Adjustable Length: Measure the width of the space where the rod will be installed. Select a rod with an adjustable length that falls within this measurement range. Ensure the rod is not extended to its maximum length, as this may compromise its stability. Ideally, select a rod where the intended width falls near the middle of the adjustable range.
Weight Capacity: Check the manufacturer's specifications for the maximum weight capacity of the rod. This is a critical factor in determining whether the rod is suitable for the selected curtains. Consider the weight of the curtains, including any linings or embellishments. It is always prudent to choose a rod with a weight capacity that exceeds the actual weight of the curtains to provide a safety margin.
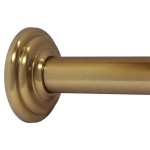
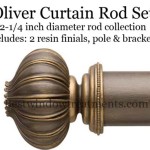
Rod End Design: The design of the rod ends influences both the appearance and the grip of the rod. Rubber or silicone end caps provide better traction and prevent slippage, especially on smooth surfaces such as tile or glass. Some rods feature larger end caps for increased surface area and stability. Others have a decorative or specialized design that might complement the room's aesthetic.
Rod Finish: Tension rods are available in a range of finishes, including chrome, nickel, brass, and painted colors. Choose a finish that complements the curtains and the overall décor of the room.
Preparing the Mounting Surface and Curtains
Proper preparation is essential for a secure and aesthetically pleasing installation. This involves cleaning the mounting surfaces and preparing the curtains for hanging.
Cleaning the Mounting Surface: Before installing the tension rod, thoroughly clean the surfaces where the rod ends will make contact. Use a mild detergent and water to remove any dirt, dust, or grease. Dry the surfaces completely. This ensures maximum adhesion and prevents the rod from slipping.
Curtain Preparation: Examine the curtains for any defects or loose threads. If necessary, iron or steam the curtains to remove wrinkles. Determine the desired height and placement of the curtains. Consider whether to use curtain rings, clips, or a rod pocket. If using curtain rings or clips, attach them to the curtains before installing the rod. Ensure even spacing for a balanced appearance.
Measuring and Marking: Measure and mark the desired location for the rod on both sides of the window frame or doorway. Use a level to ensure that the marks are aligned horizontally. Precise measurement will contribute to a neat and professional-looking installation.
Considering Light Control and Privacy: Before definitively hanging the curtains, consider their effect on light control and privacy. If complete darkness is desired, choose blackout curtains. If privacy is a primary concern, select curtains with a dense weave. Adjust the placement of the rod and curtains to achieve the desired level of light control and privacy.
Installation Techniques for Optimal Stability
The actual installation of the tension rod requires careful attention to detail to ensure stability and prevent slippage. Follow these steps for a successful installation:
Extending the Rod: Extend the tension rod slightly beyond the measured width of the space. This creates the necessary pressure for a secure hold. Avoid overextending the rod, as this can damage the mechanism and reduce its weight capacity.
Positioning the Rod: Carefully position the rod between the marked locations. Ensure that the rod ends are making full contact with the mounting surfaces. Hold the rod firmly in place while making final adjustments.
Applying Pressure: Twist the rod to increase the tension until it feels secure. Test the rod's stability by gently tugging on it. If the rod slips, increase the tension slightly and test again. Avoid applying excessive force, as this can damage the mounting surfaces or the rod itself.
Hanging the Curtains: Once the rod is securely in place, hang the curtains. Distribute the weight of the curtains evenly along the rod to prevent sagging or uneven pressure. If using curtain rings or clips, ensure that they are securely attached to the curtains and properly spaced along the rod.
Fine-Tuning and Adjustments: After hanging the curtains, step back and assess the overall appearance. Make any necessary adjustments to the rod's position or the curtain's arrangement. Ensure that the curtains hang evenly and that the rod remains level. Check the rod's stability periodically, especially after hanging heavier curtains. Re-adjust the tension if necessary.
Addressing Potential Problems: If the tension rod continues to slip, consider the following solutions: Clean the mounting surfaces again, ensuring they are free of any residue. Use rubber or silicone pads between the rod ends and the mounting surfaces to improve traction. Consider using a stronger tension rod with a higher weight capacity. Alternatively, explore alternative hanging methods, such as spring-loaded rods or adhesive-backed brackets. If the mounting surfaces are weak or damaged, consider reinforcing them with a strip of wood or metal.
Maintaining the Installation: Regularly inspect the tension rod and curtains for any signs of wear or damage. Dust the rod and curtains to prevent buildup of dirt and debris. Tighten the tension as needed to maintain stability. Replace the rod or curtains if they become worn or damaged.
By following these guidelines, individuals can successfully hang curtains with tension rods, achieving both functionality and aesthetic appeal without the need for permanent fixtures. The key is careful preparation, proper selection of materials, and meticulous execution of the installation process.

Types Of Curtain Rods The Home

5 Easy Ways To Hang Curtains Without Drilling

4 Ways To Use A Tension Rod Wikihow

10 Clever Ways To Organize Decorate With Tension Rods

Roomdividersnow 80 In 120 Premium Tension Curtain Rod Black Trod Br144 The Home

5 Easy Ways To Hang Curtains Without Drilling

How To Keep Your Curtain Rod From Sliding Spiffy Spools

How To Hang Curtains Without Drilling Holes Open Blinds

How To Put Up Twist Tension Rods For Curtains No Holes Drilled

Roomdividersnow 28 In 50 Tension Curtain Rod Black Trod Blk54 The Home